

OVERVIEW
In order to provide the customer with the best use of Laikeman vinyl sheet flooring, this installation guide has to be followed carefully to guarantee conformity and ensure sports performance. If not, Laikeman Flooring will not be responsible for damages following installation.
Any use of the product for purposes other than the ones set out, in the condition of use, should be submitted to Laikeman Flooring for prior approval. If you need any further information, please contact your dealer who will provide you with the appropriate advice.
Check before installation, the quality of the delivered product. If the product is defective, contact Laikeman Flooring. If installation is in process, it shall be stopped on the day the defect is noticed otherwise the Warranty shall not apply.
SUBFLOOR

The subfloor must be dry, flat, clean, strong and without cracks. The moisture rate for concrete or cement screed must be in accordance with the local requirements.
For exemple : France, USA ≤ 4,5% and Germany < 2% (CCM method),…
Choice of laying techniques Subfloor | Glued | Tape |
Surface appearance | Smooth without cracks | |
Flatness | ≤ 6mm under 3m ruler | |
Altimetry | +/- 1cm compared to the average | |
Moister rates for concrete | Local standard compliant | ≤ 7% |
Moister rates for anhydrite screed | < 0.5% | < 1% |
Saw joints treatment | Yes | Yes |
Cracks < 1mm treatment | Yes | No |
Levelling compound (necessary if the surface appearance is not smooth or if the flatness is not compliant) | If the concrete is exposed to capillary moisture surges, it’s necessary to waterproof the subfloor by an epoxy resin (or equivalent) before applying the levelli | For localized concrete repair, use a specific moisture-resistant levelling. |
INSTALLATION
1.GENERAL CONDITIONS
The temperature in the room must be ≥ 15°C and for the subfloor ≥ 12°C.Relative air rate moister needs to be between 35 et 65%.
Floor rolls are to be stored horizontally, on a plain/flat, dry and without any ruggedness. They must not be stacked.
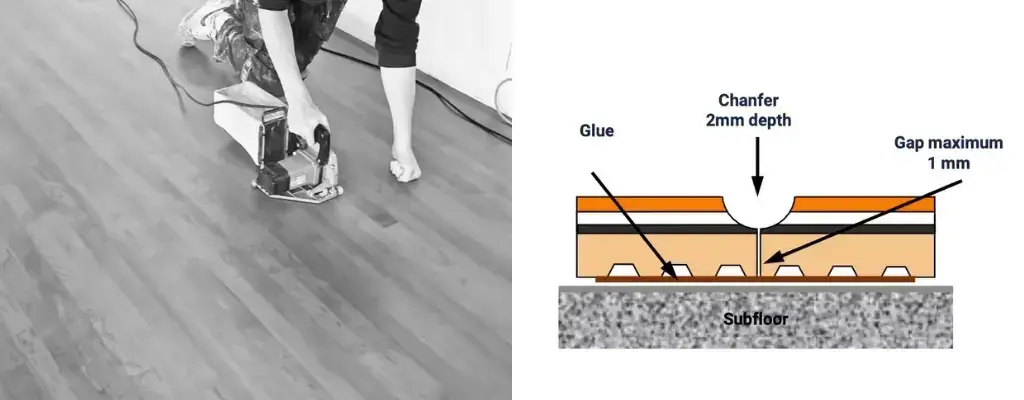
Unroll the rolls and leave a space of 1 cm between them for at least 24 hours. If necessary, re-cut the selvedge. Let the Vinyl Floor rest before adjusting the sheets, edge-to-edge, gap < 1mm.
After installation, ensure that the temperature is always maintained between 10 and 45°C.
2.GLUED INSTALLATION
For large areas ( >800sqm), or commercial floor, dance floor, must be installed using glue.
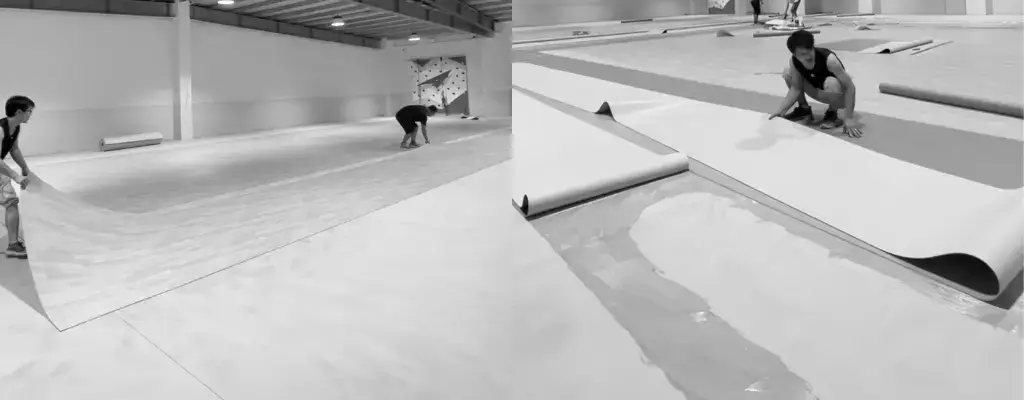
Roll half way back the sheets carefully on the first half of the gymnasium and start from the longitudinal axis or transversal axis to avoid moving the sheets from their original positions.
Apply the acrylic glue on the uncovered half of the sub-floor, starting with the center strips and working outwards.
Only glue the adequate surface of floor covering, considering the drying time in order to make the glue transfer effective to floor covering back (maximum two or three sheets at the same time).
Glue consumption is about 250-300gr/sqm with a thin toothed spatula.
Lay Vinyl Floor rolls on the sub-floor and make sure that setting time specified by the glue manufacturer is respected. Start by the first one along the longitudinal axis or along the transversal axis.
Press all the surface glued with cork to eliminate the air bubbles located between the sub-floor and Vinyl Floor then use a 50kg heavy roller, this will enable the glue to transfer perfectly on Vinyl Floor.
Repeat the same operations for the second half Vinyl Floor sheets and the second half of the gymnasium.
Don’t leave any heavy load on Vinyl Floor during the whole glue drying time (72h).
Video Guidance:https://youtube.com/shorts/CMpvGjVvbS0
3. WELDING
24 hours after gluing
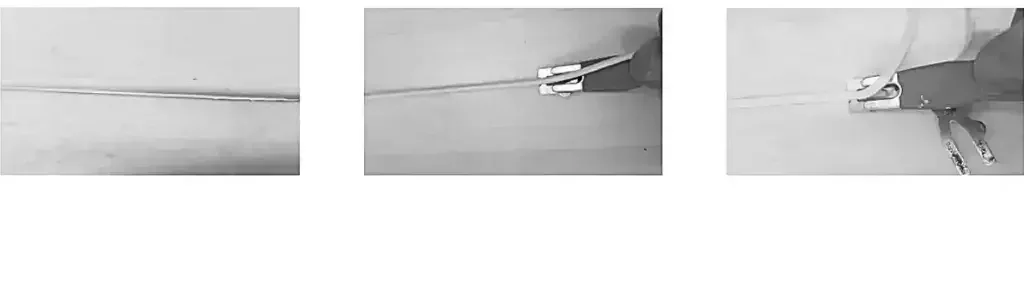
The grooving:
This operation should be performed by using an electric tool with a “U” shaped blade as described, for 4 mm diameter welding rod, the width of mill must be 3.3mm and the maximum depth must be 2mm.
The welding:
We strongly recommend, for this operation, an automatic cart (Leister or similar), which will produce more regular, professional quality welds.
Before welding floor, first of all, try to weld on an apart piece of product, in order to check that the temperature and the speed of this material enables to perform a good welding conditions.
To obtain an optimal result, we recommend to set the temperature on 450°C(, speed: 2m/min.